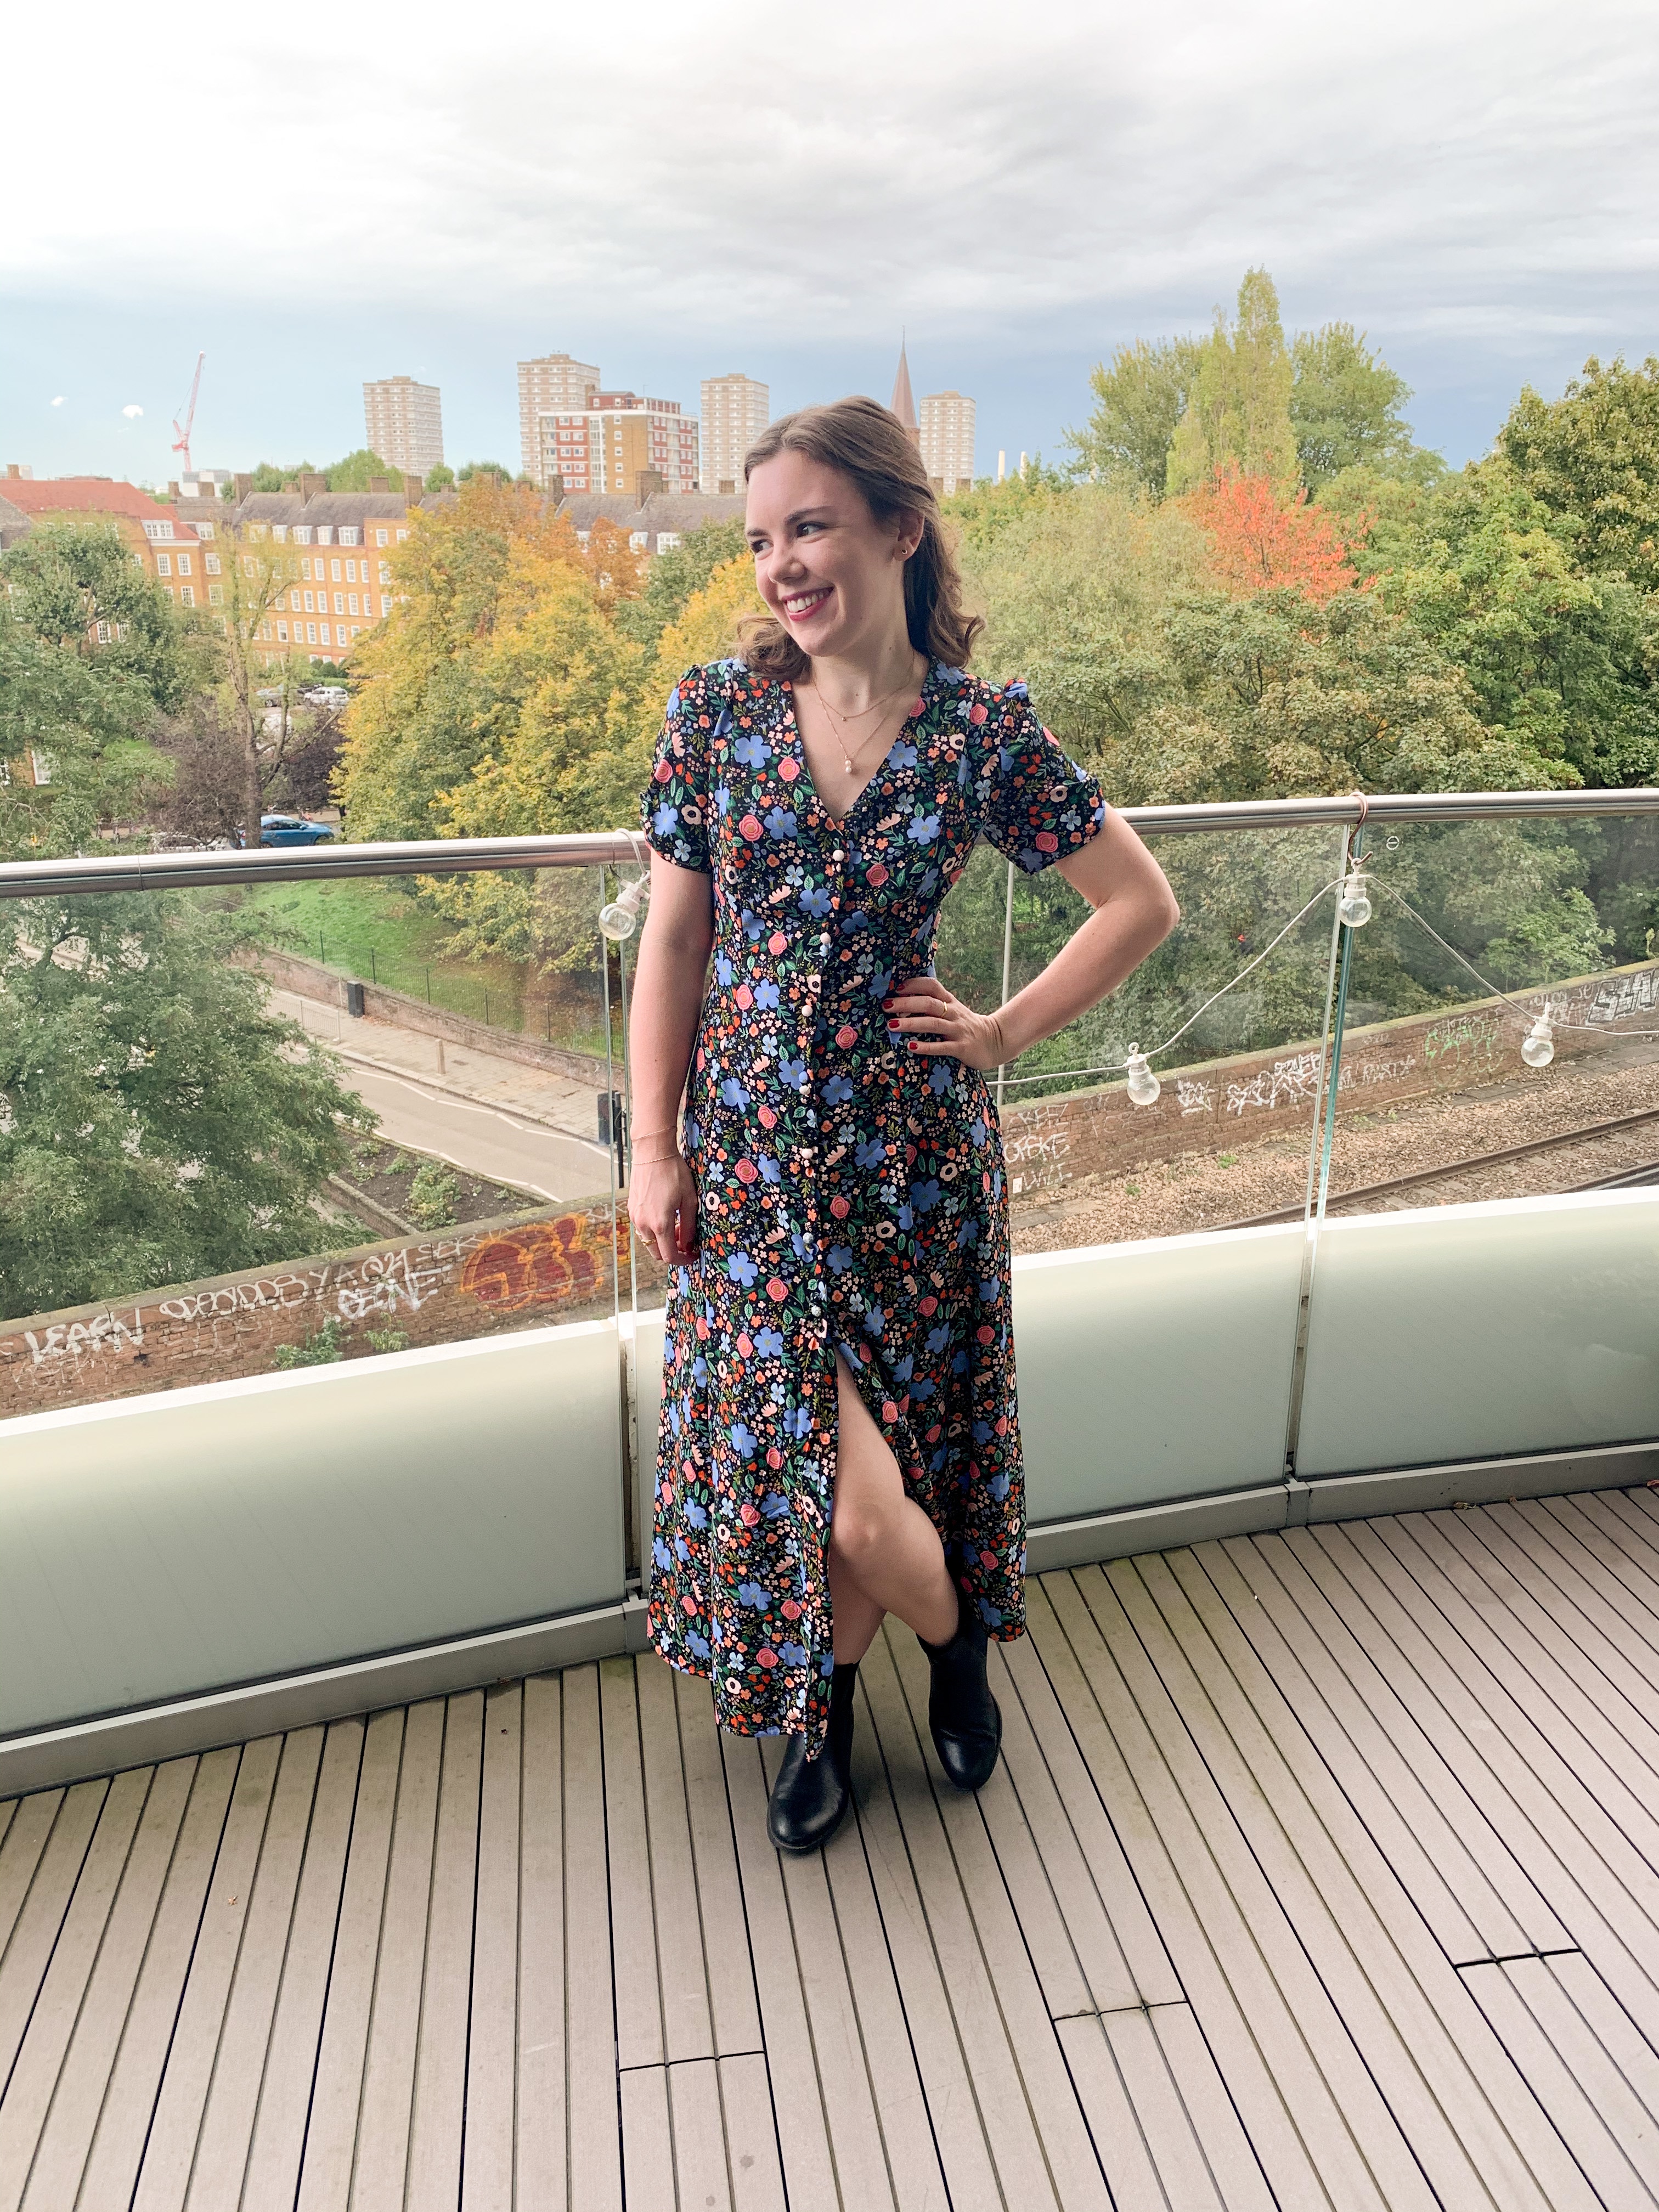
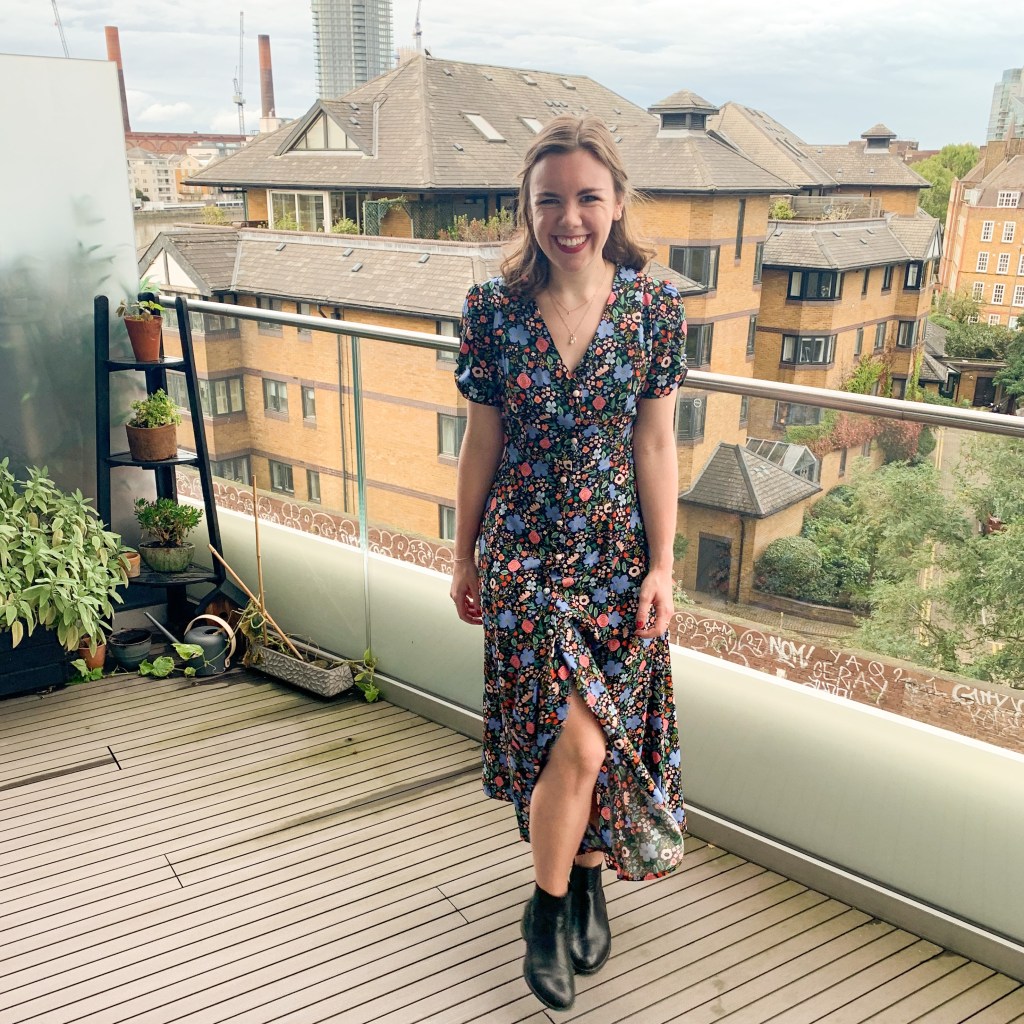
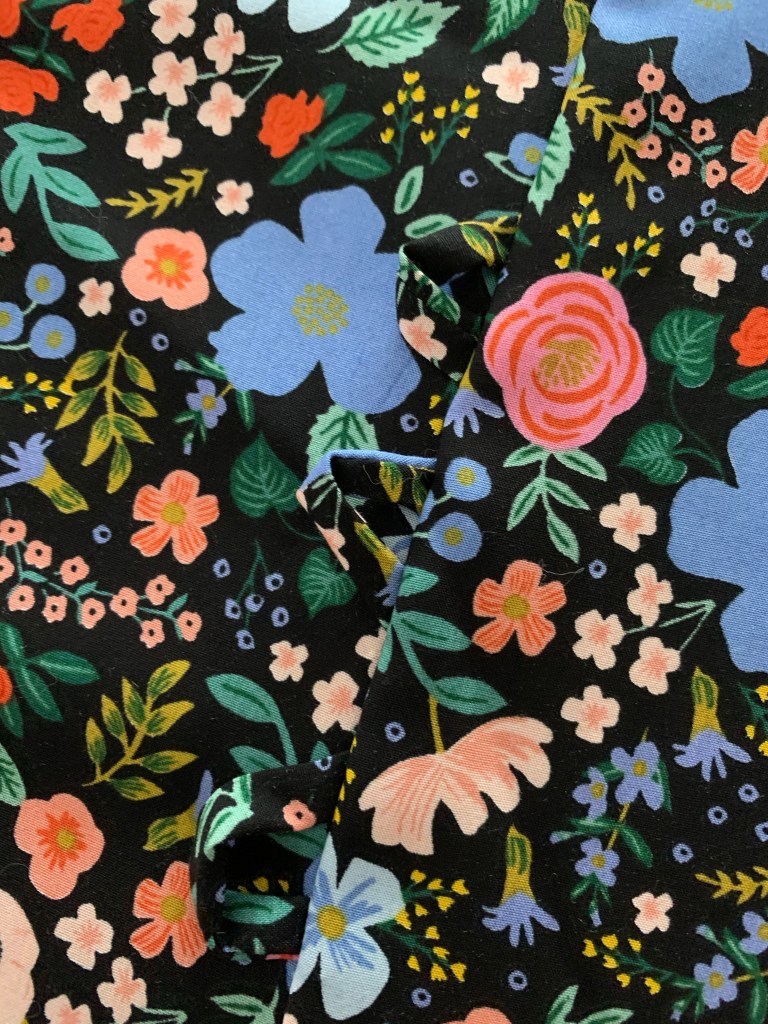
My last Shelby dress was a total winner, I’ve reached for it so many times since I made it so I knew I had to make another. I had this Rifle Paper Co rayon earmarked for the Shelby pattern since it came out in March but since it was Autumnal I left it until now to sew it up.

It’s always a treat to make something in Rifle Paper co but as you may know it’s very narrow fabric so I needed 4 yards to make this, and I squeeeezed it out, with pieces in both directions.
I decided to do a lack up back on this one and I used the tutorial on the True Bias blog – it was quite straightforward and only involved a couple of scraps to make the loops.


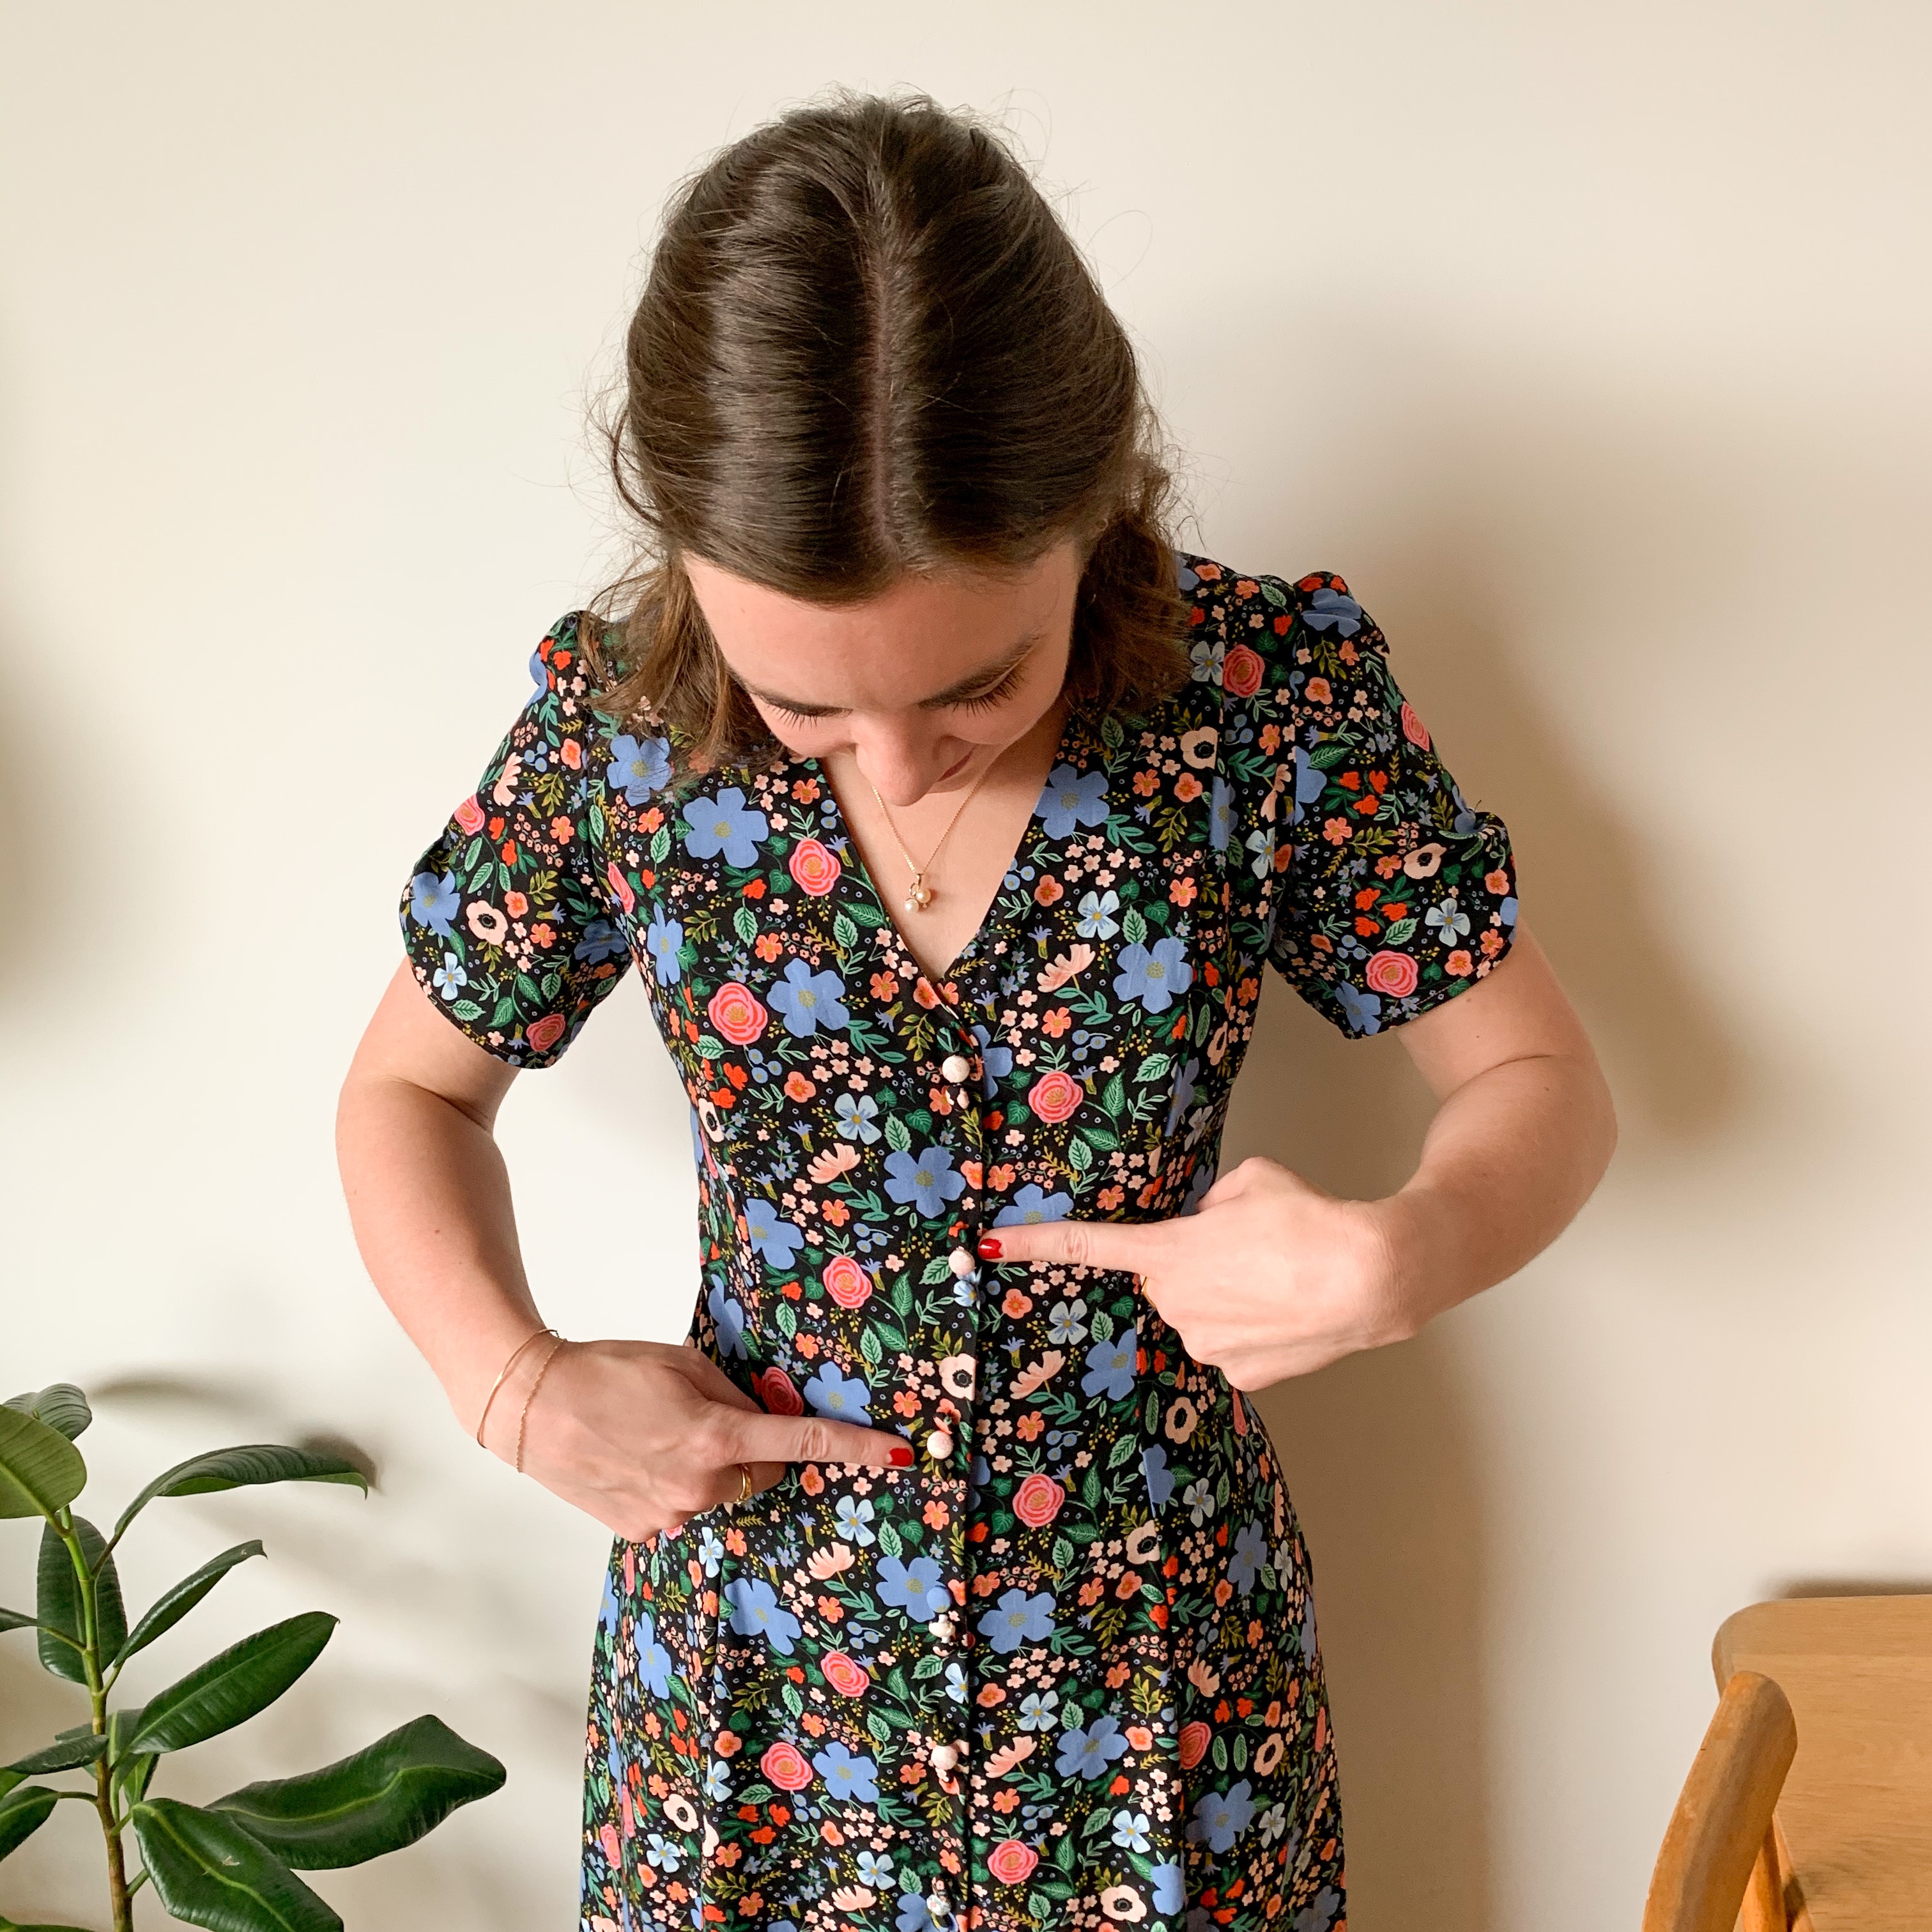
For this one I didn’t use interfacing on the facings because my last one was a little stiff. The only other change I made was to grade out at the shoulders slightly because my last version was a little narrow on the shoulders.

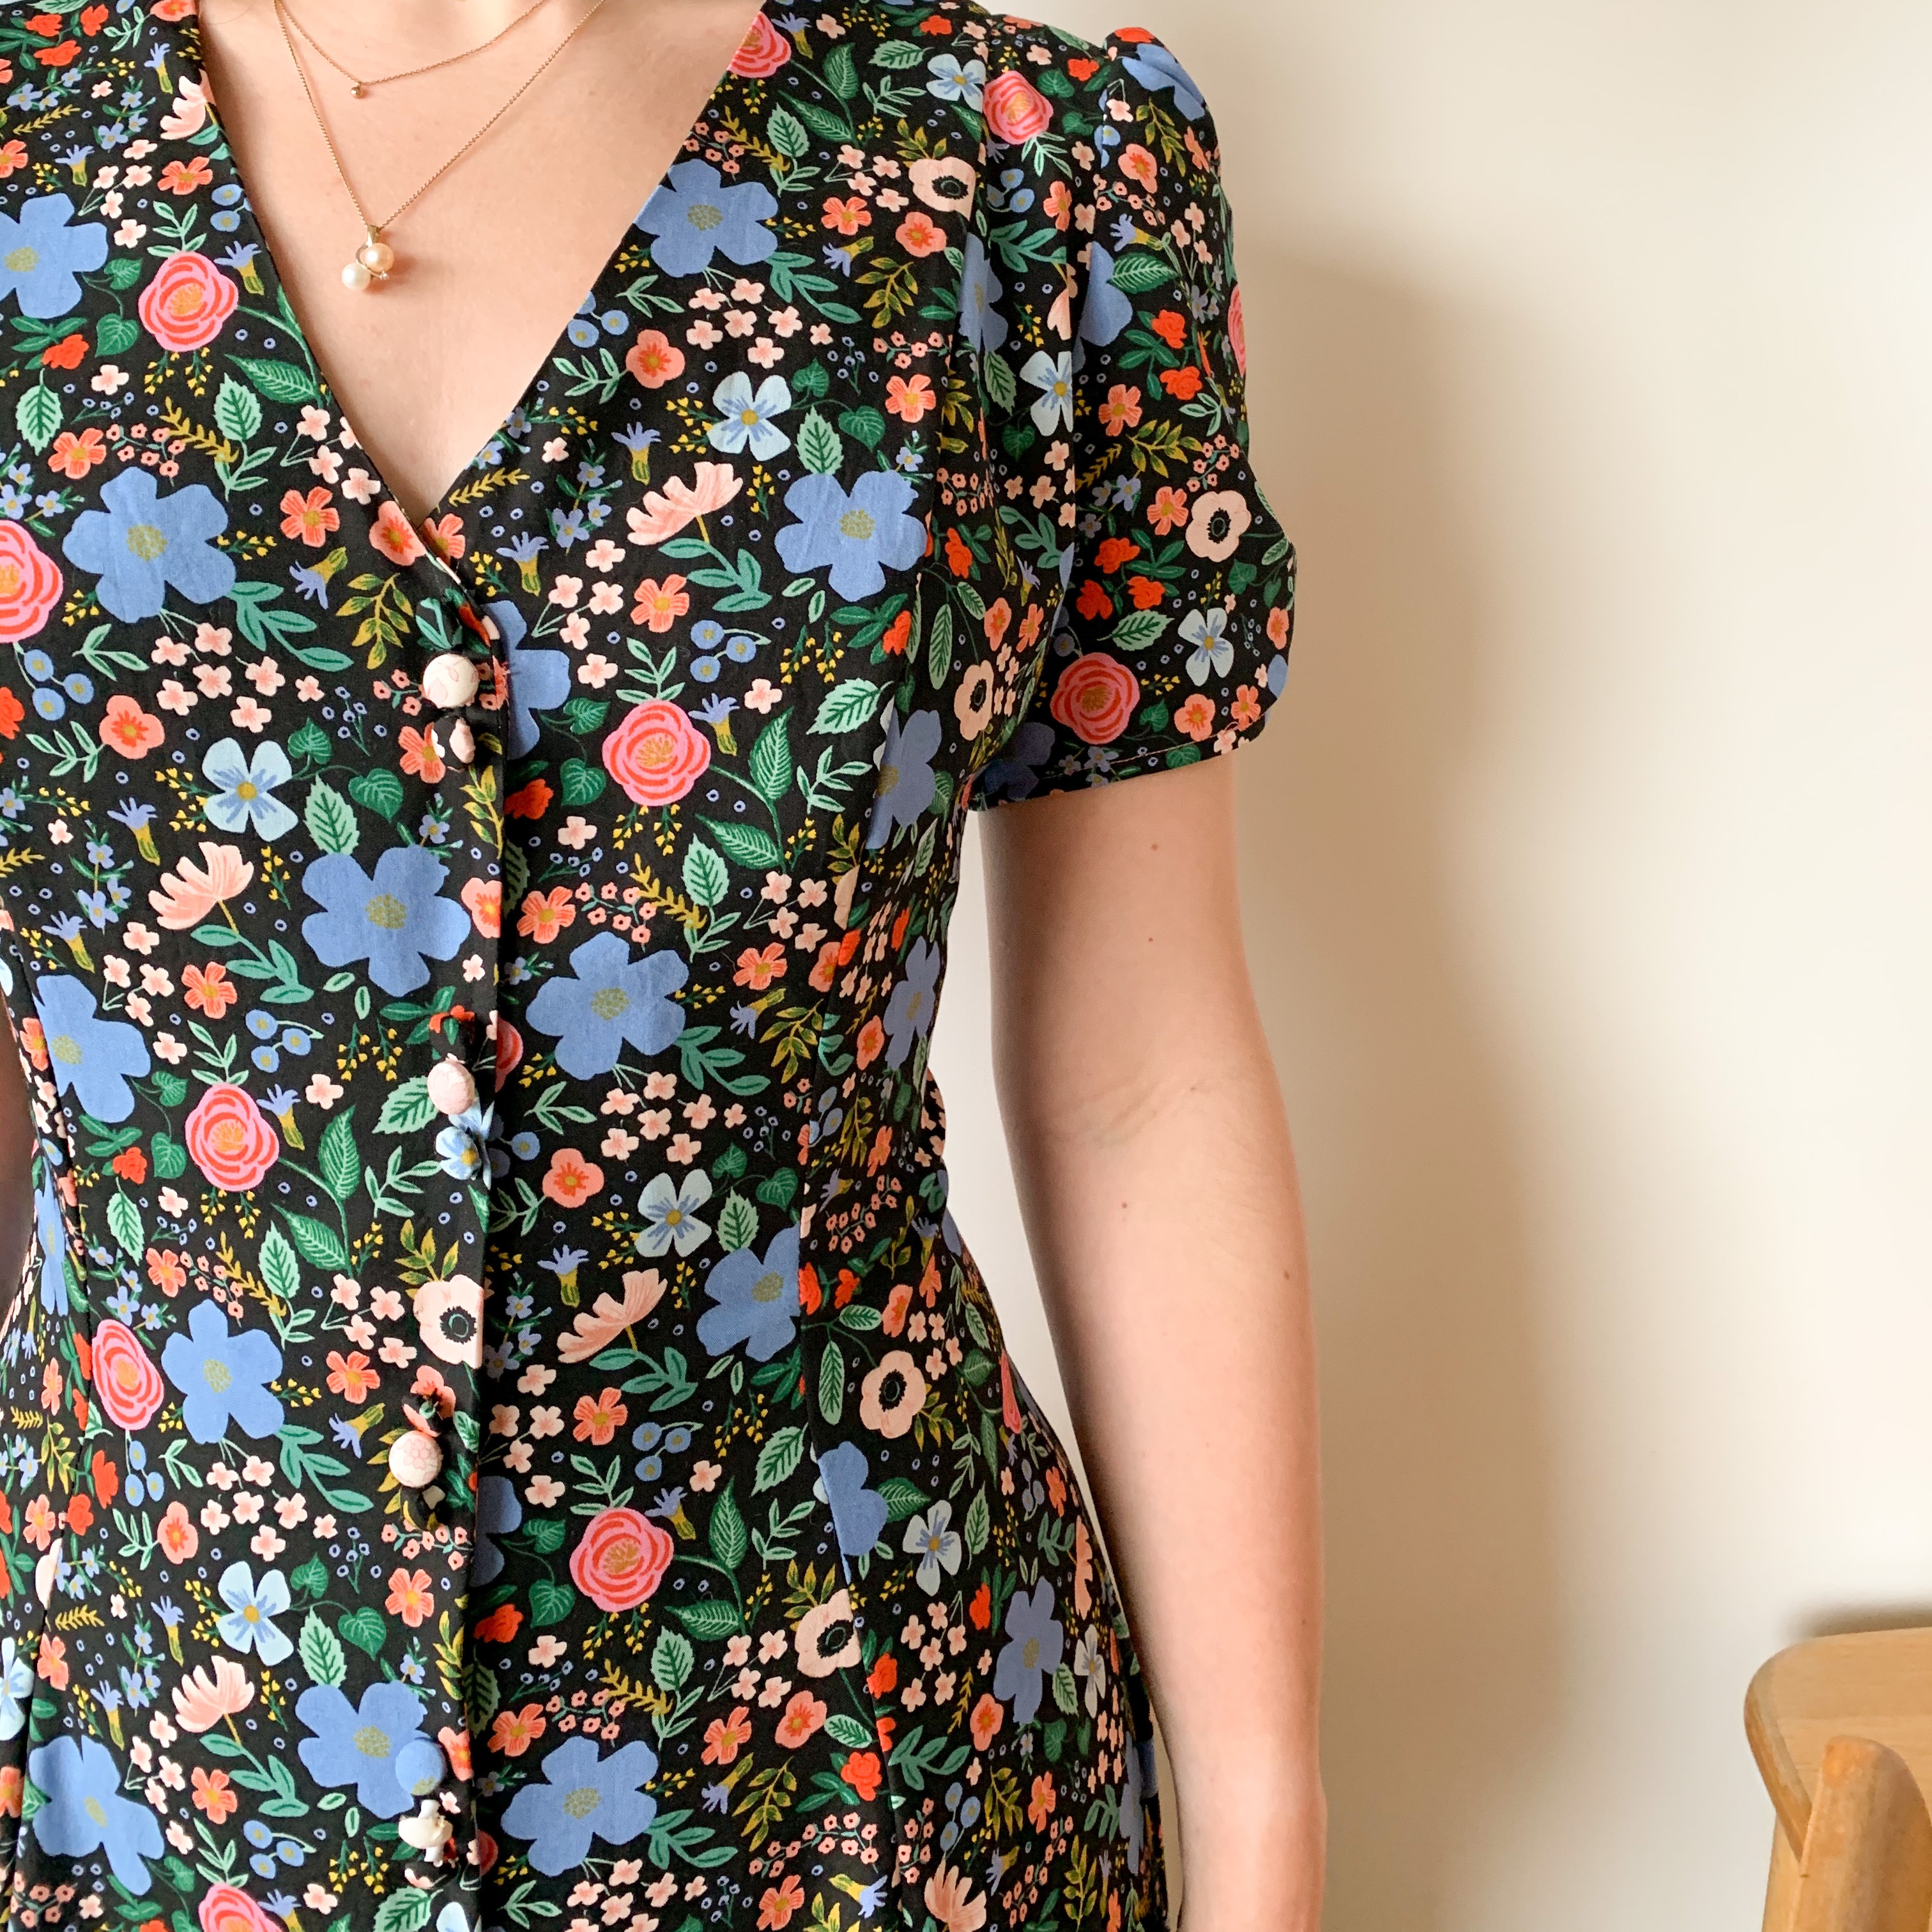
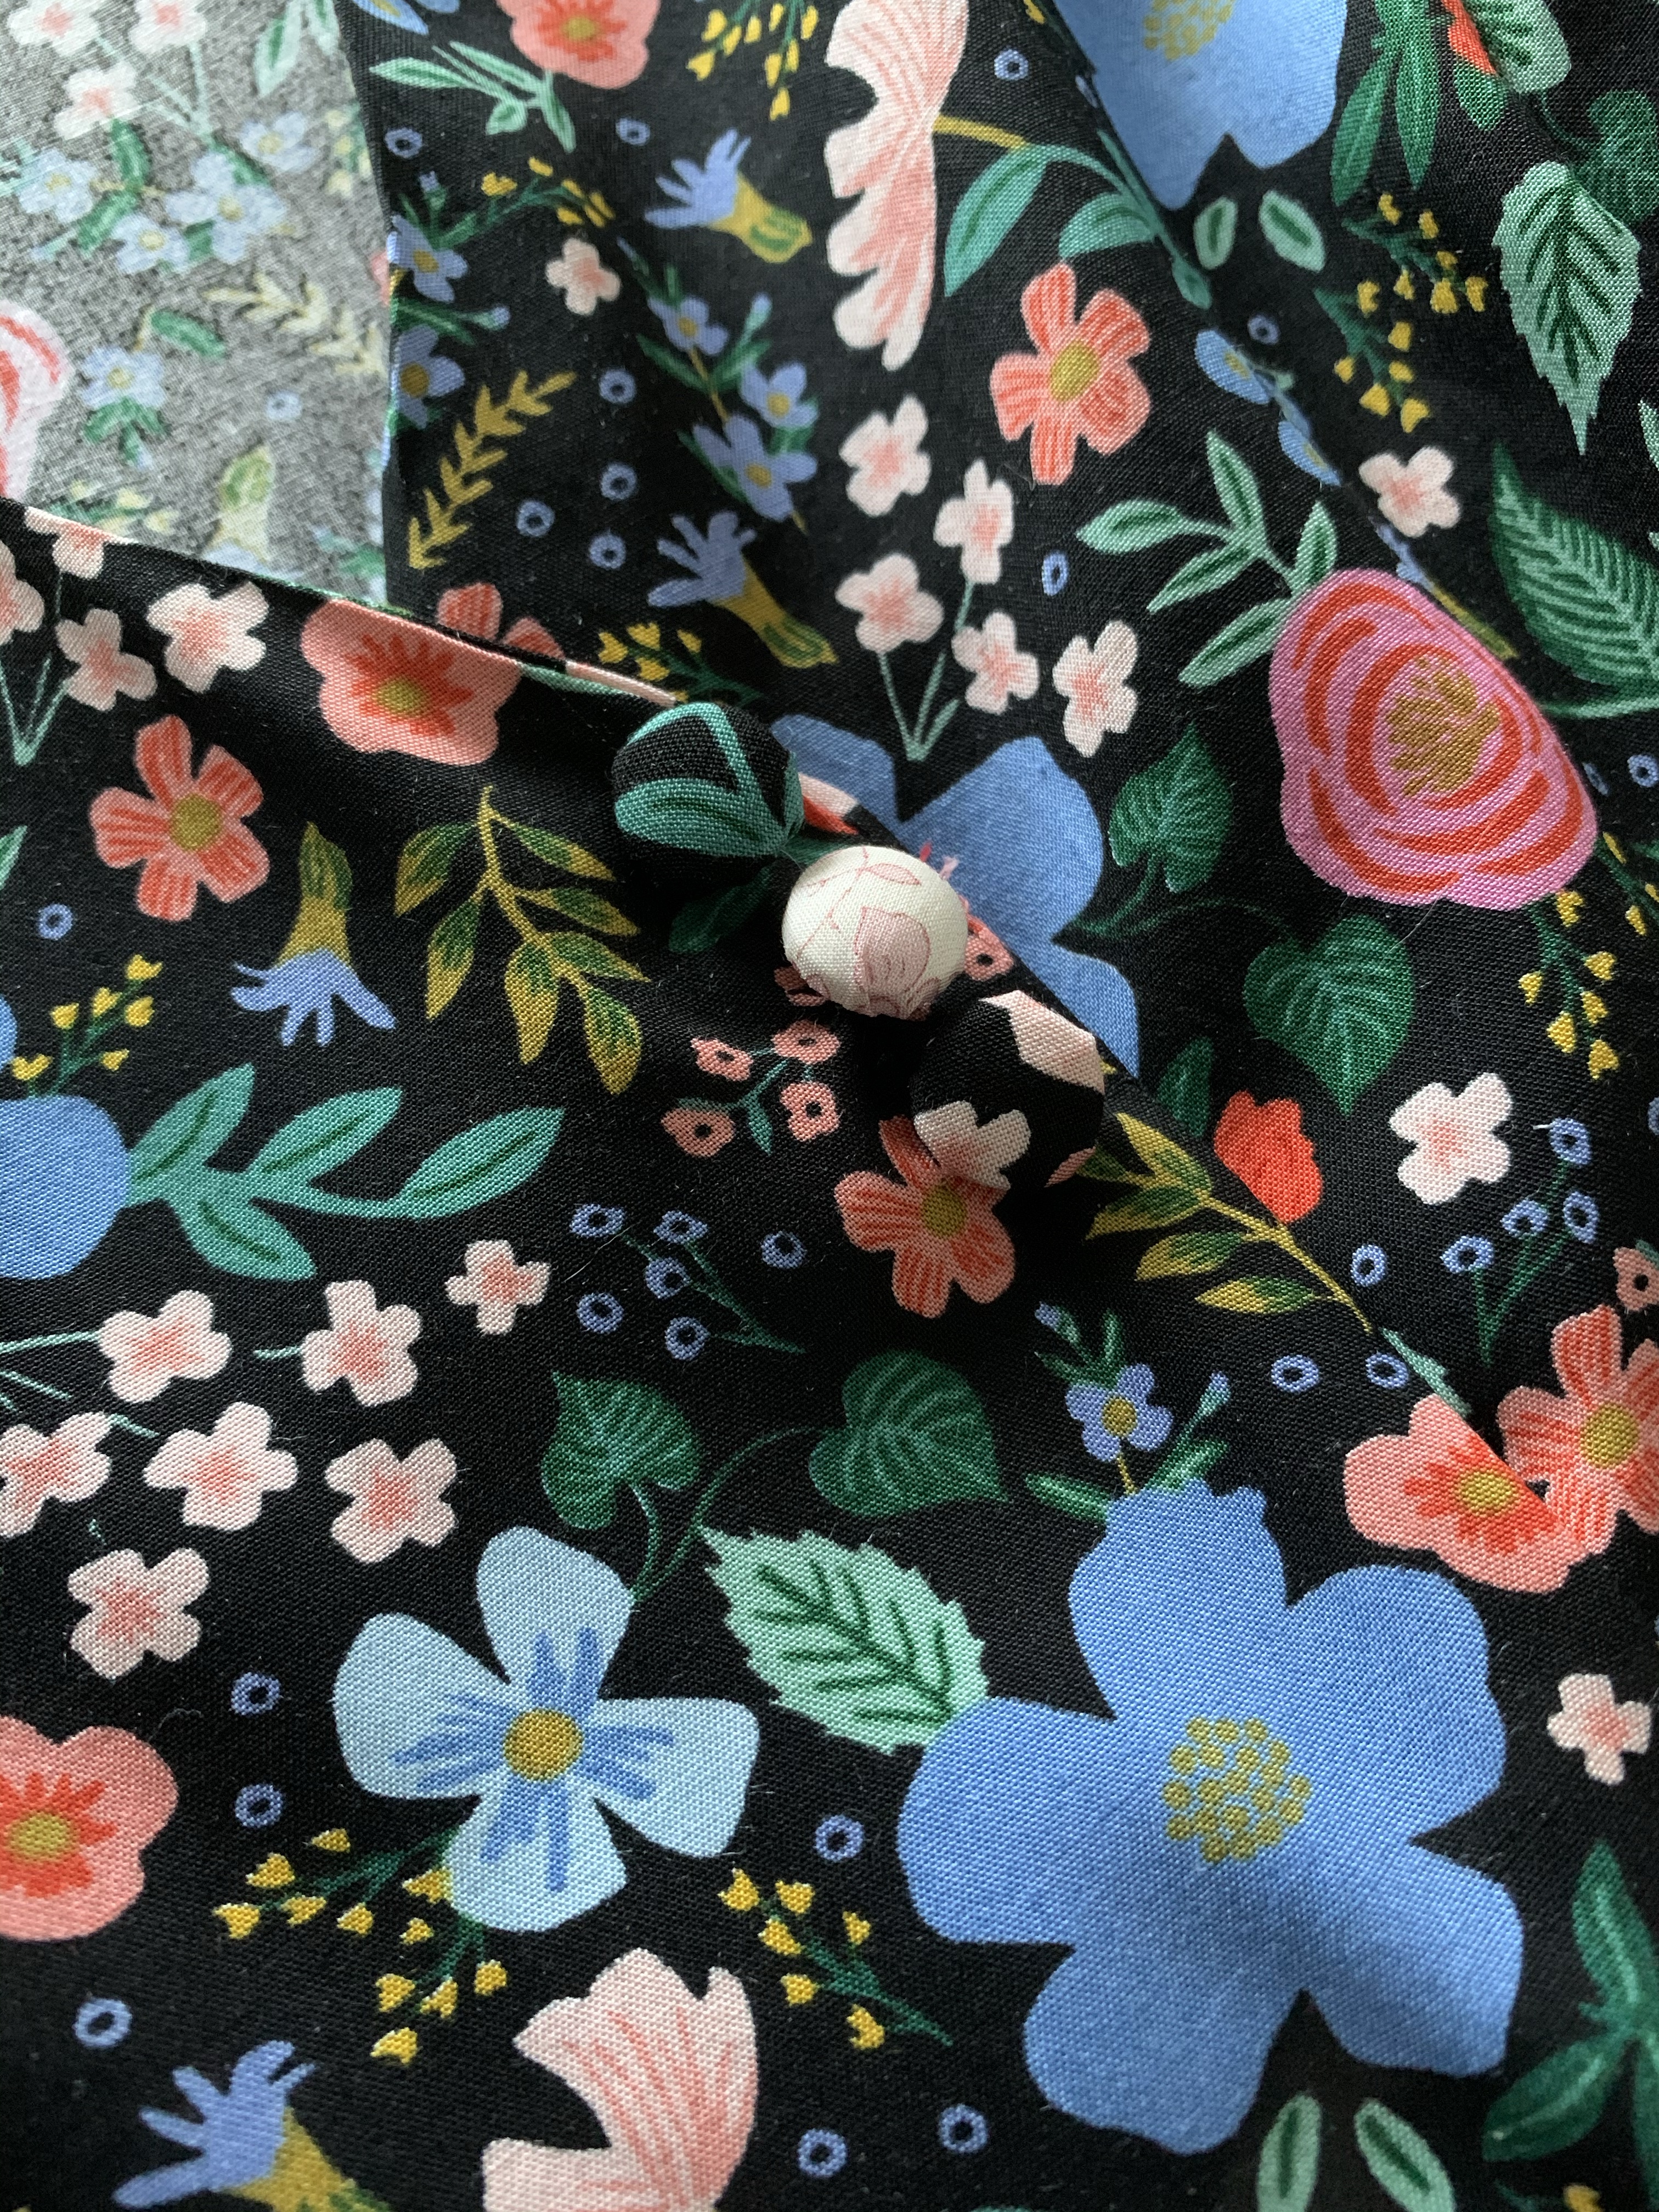
I mulled over the buttons for a while and decided to make my own covered buttons. I got a few questions on Instagram about how to make them and I used two different methods; I made 23 in total so I got in some practice! The first was with some Hemline plastic self cover buttons – for these ones you cut a circle according to the size on the packet instructions, sew a running stitch around the edge and then gather it up round the button head, placing on the cap to secure it. The second method was with metal self cover buttons where I used a self cover button tool to gather up the fabric and press the cap on. Both are a little fiddley – I think I prefer the finish of the metal ones. I’ve washed the dress and both look fine, but I imagine the plastic ones may wash better over time.
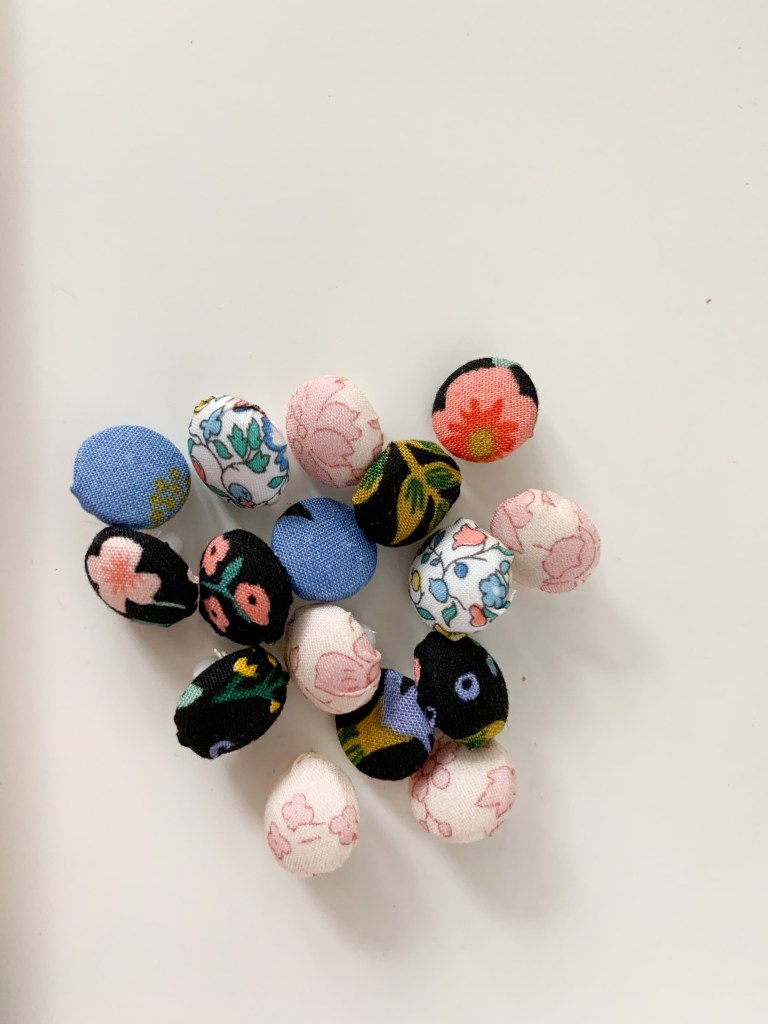
For the buttons I mainly used scraps from the same fabric, but also a couple of Liberty scraps to mix it up. I did sets of 3 buttons down the front and one on each sleeve. I didn’t make button holes as I knew I could get the dress over my head and I wanted the buttons to be close together so I just sewed through both facings.

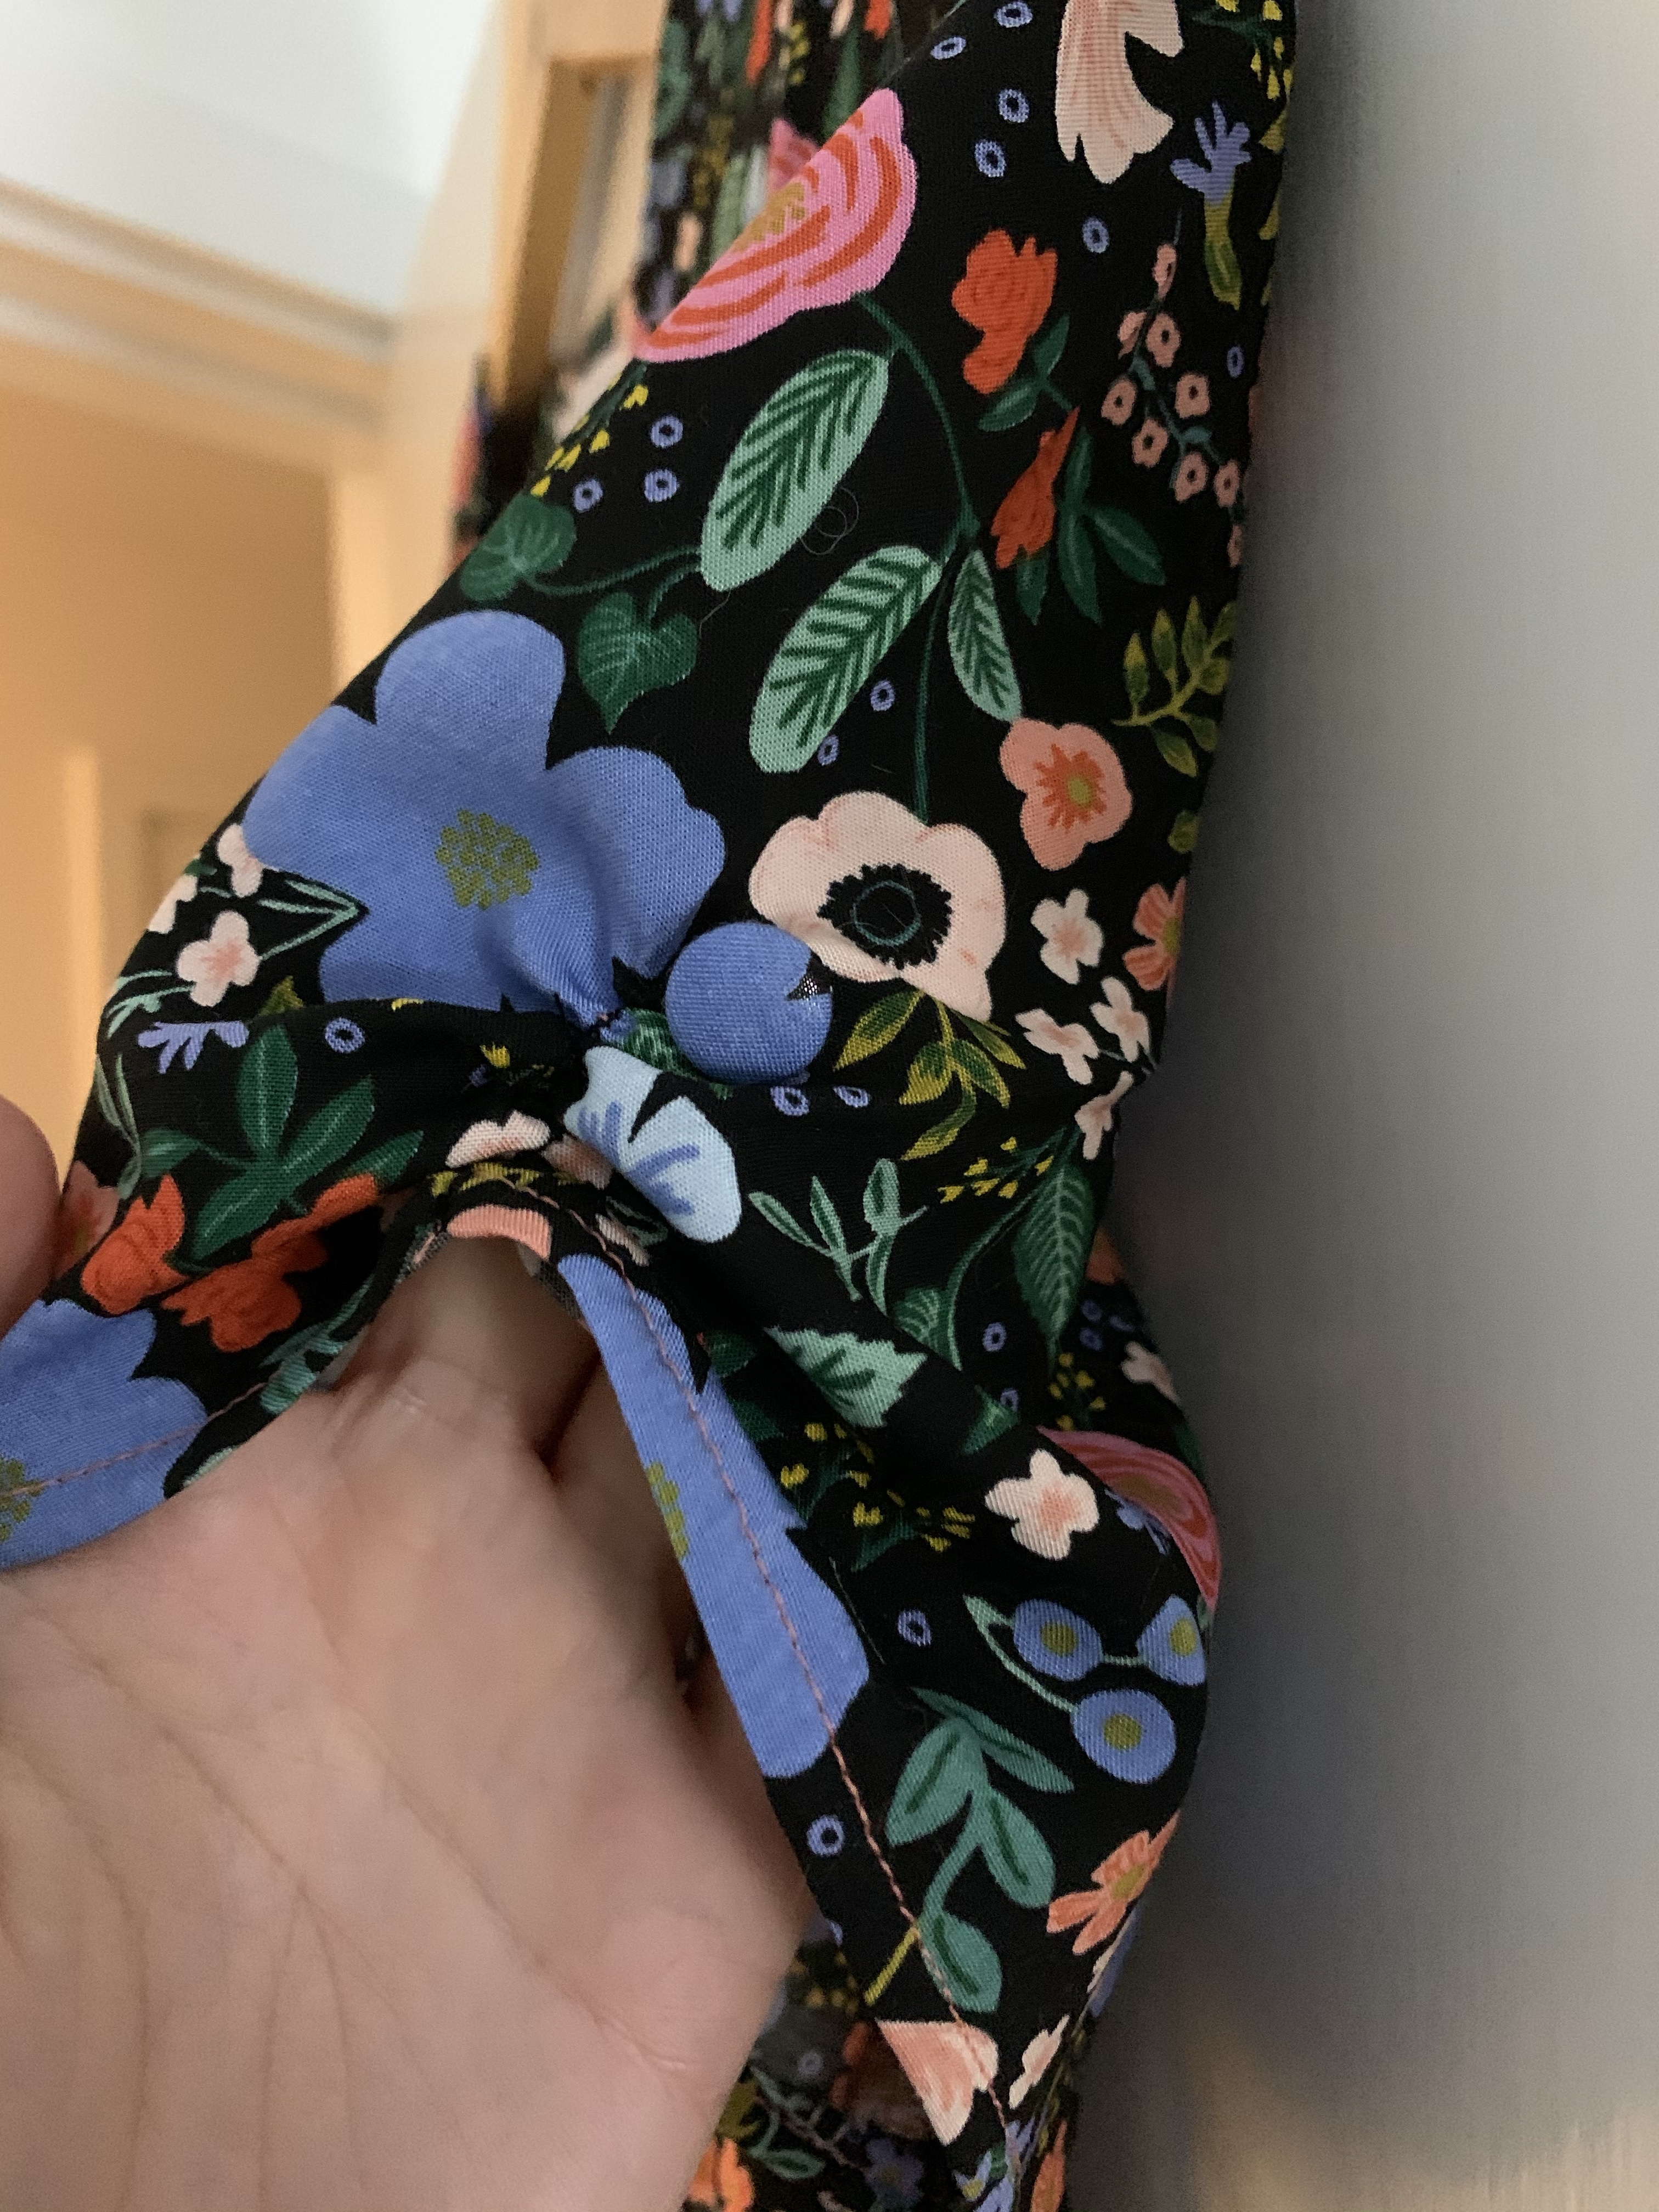
The final finish was a method I learnt from the Nina Lee Kew Dress which was sewing a straight line of stitching vertically half way up the sleeve and gathering it up and knotting it to make a kind of tea dress style sleeve. I sewed the button at the top as a final touch.
This dress was a labour of love and it was nice (and rare for me!) to spend so much time on those finishing touches, but I think that’s why it’s extra special. Even if you need a magnifying glass to see the covered buttons!